Tutorials
Learn the ins-and-outs of how to use Zoog
Creating and Sharing a Zoog
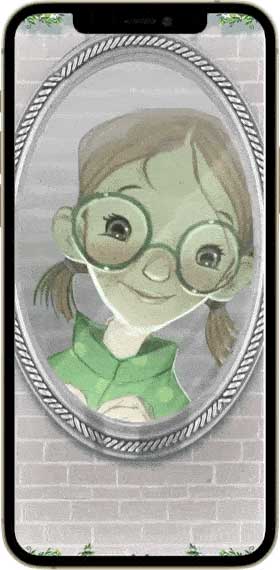
Once you open Zoog, you land on the ‘Create’ page, where an array of both fresh and featured Zoogs welcome you. Take a moment to explore and indulge in the adorable creations showcased here. As you scroll to ‘Books’, select one that interests you. For instance, we’ll take ‘Winnie the Pooh’. A sneak peek of how your book will look is instantly displayed.
Continue scrolling to find a comprehensive description of the book and the chapters it contains.
Tap on ‘Glimpse’ to read the book and get a sense of whether it resonates with you. Once you’re satisfied, it’s time to bring the book to life! Upon choosing to record, you’ll encounter a tap-to-record button. A click on it triggers a 3-2-1 countdown, and voila – you’re part of the story. A script at the bottom of the screen guides you, while dynamic animations augment your narrative. Navigate through the pages of the book using the blue button on the right, and as you do, the animations transform to align with the plot. A progress bar at the top indicates how far you’ve traveled into the story.
When the adventure concludes, the green button helps you wrap up your recording, presenting you with your very own creation. From here, you can choose to move to the next chapter, share your recording, or you can pause the preview to restart from the beginning or exit the story.
Click on the share button at the bottom to send it as a text message just like any other. Decide who to share your creation with, and hit ‘send’. This video can be viewed by the recipient on any device, anytime, making the experience of Zoog accessible and enjoyable for all.
Viewing and Sharing Past Zoogs
Begin your journey by entering the Zoog app, and from the ‘Create’ page, navigate to ‘My Stories’ located at the bottom left corner. Here, you will be greeted with all your past Zoogs and those that you’ve received from others. Look for the three-dot icon for more options. Clicking on it unveils a host of actions you can undertake: send your Zoog to someone, edit its title, delete it, or even record a fresh version of it.
Once you’ve exited this menu, feel free to scroll down and take a trip down memory lane, rediscovering all your previous Zoogs. On each of these Zoogs you will find the play button. Click on it to preview your creation. This screen also provides you with the option to share your Zoog right away, or you can choose to step back out and continue your exploration.
Exploring Zoog Notifications
Start by opening the ‘Notifications’ page within the app. As you scroll through, you’ll be greeted by a slew of announcements about freshly released Zoogs. These updates keep you informed about the latest additions to our magical library.
In this same space, you can also view reactions from your family members who have enjoyed your Zoogs. This offers a great way to engage with your loved ones and appreciate their feedback.
What’s more, you can also find requests from your family for new Zoogs, sparking new inspirations for your creative adventures. Clicking on a notification takes you to the Detail Page, where you can read about it in detail and preview the animation. You can also always mark a particular Zoog as a favorite by clicking on the star icon. This way, your cherished stories are always within reach. You can also share the Zoog description with someone else who may enjoy creating it themselves.
Creating a Song on Zoog
Embark on your musical journey by navigating to the ‘Create’ page of the app. This is the screen you’ll see when you first open the app, too. As you explore our library of songs, select the song you’d like to create.
To start recording, simply click the record button. Following a brief countdown, the music will begin playing and it’s your turn to shine – sing along in a fun, karaoke-style session.
The lyrics bounce along to guide you as you sing and dance to the tune. Remember to ensure your volume is turned up so you can hear the music clearly. As the song unfolds, the progress bar at the top of the screen moves accordingly, showing you how far along you are in the song. When the song comes to a close, click on the green checkmark as you usually do to finish the recording, and behold your musical creation right away.
From this point, you have several options. You can send your musical Zoog, or if you’re not completely satisfied, you can pause the preview to record again. You also have the choice to click the ‘X’ to save this creation, keeping it for sharing later from the ‘My Stories’ page. And if you decide you don’t want to keep or share it at all, you have the option to delete it.
Recording a Zoog Creation Again
Enter the Zoog app and pick a creation from the ‘Continue Reading’ section. For example, ‘Winnie the Pooh’, a book we’ve previously read in this tutorial series. As you scroll down, you’ll see the relevant details about the Zoog, as well as an option to send your existing creation to someone. But, if you wish to start afresh, click on the arrow to access all the versions of this Zoog you’ve created in the past.
To create the Zoog again, click ‘Record New Version’. You can also select the Record a New Version button at the bottom of the screen if it appears. Once you start, you’ll be met with the familiar tap-to-record screen, followed by the 3-2-1 countdown. As usual, the text appears at the bottom of the screen, guiding your narration. You can record, save, and share the Zoog creation in the same way as always. All the Zoogs you create and save can be found in the ‘My Stories’ page for future viewing or sharing.
Pausing and Screenshotting
Let’s learn a few of the key features that enhance your Zoog recording experience. First is the screenshot feature, which allows you to capture and save memorable moments from your Zoog journey directly to your camera roll. Do this by clicking the white camera button on the left side while recording. Secondly, Zoog has a ‘pause’ function that caters to your pace.
If you need a break from recording, just hit ‘pause’, and when you’re ready, click ‘resume’. A quick 3-2-1 countdown will get you back into your story smoothly. Finally, the ‘X’ icon in the upper right-hand corner gives you the flexibility to either start over or delete the current recording, as you see fit.
Adding Your Contacts to Zoog
Let’s learn how to your add loved ones, such as your children or grandchildren, to your Zoog contact list.
To start, select the send button on the Zoog you’d like to share. You will see a contact sheet with an “add child” option. Tap this and enter the child’s name to save them to your contacts. Next, choose an avatar or photo of the child from your camera roll. Once you’ve picked the image, confirm your relationship, the child’s age, and then select “add.”
Voila! The child is now in your contacts list, ready to receive Zoogs with personalized messages from you. We hope this tutorial has helped explain how to add to your Zoog contact list. Thank you for watching and being part of the Zoog community.
Still need assistance?
You might find the answer you’re looking for in our FAQs. Plus, our support team is here to help! Click the blue and white icon in the bottom right corner of this website, or select ‘Support’ in the menu bar at the top.
You can also find the question mark button in the upper right corner of the Zoog app, or email us at support@getzoog.com